For the last three years I have been driving around with the display for my TYT TH-7800 mobile radio on an articulating arm, and the main body of the radio under the driver’s seat. This worked well enough, but I found myself running the radio at full volume all the time, and while driving I was often unable to hear stations with weaker audio. I would have to concentrate on listening instead of driving, which isn’t ideal. I put up with this for entirely too long. Then in November of 2022 I swapped the TYT for an Icom IC-2730A. There were some other changes that came along with this that I’ll document later, but at this point I decided that something had to be done about the audio situation.
I picked up a nasty habit in 2022 of amassing radio gear by buying entire stations at once, and it was during one of these purchases I had acquired a Roadmaster external speaker. I am recklessly frugal, so I decided that it was better to use a speaker I already owned than to buy something else. It even came with a mounting bracket!
I had a few mounting options for the speaker. I could mount it under the front of the driver’s seat, but this was clearly a stupid idea because that maintains the exact problem I’m trying to solve. I could mount it under the dash on the driver’s side, but I felt this would get in the way. I have existing gripes with controls being low on the dash on the driver’s side, because I often rotate the headlight control knob with my knee when getting out of the truck. I could mount it on the driver’s side of the center console, but I wasn’t comfortable drilling holes in my unaltered interior trim.

I recalled a time when I borrowed an antenna launching device from Cliff AC3EU and he showed me his headrest speaker mount made out of PVC. It was a simple solution, it put the speaker as close to the ears as possible, and didn’t require any permanent modification to the interior. Then I reminded myself that I own a 3D printer, which is perfect for dumb radio nerd problems like “how do I mount a speaker where speakers usually aren’t mounted?” So I grabbed the passenger side front headrest from my truck and started measuring.
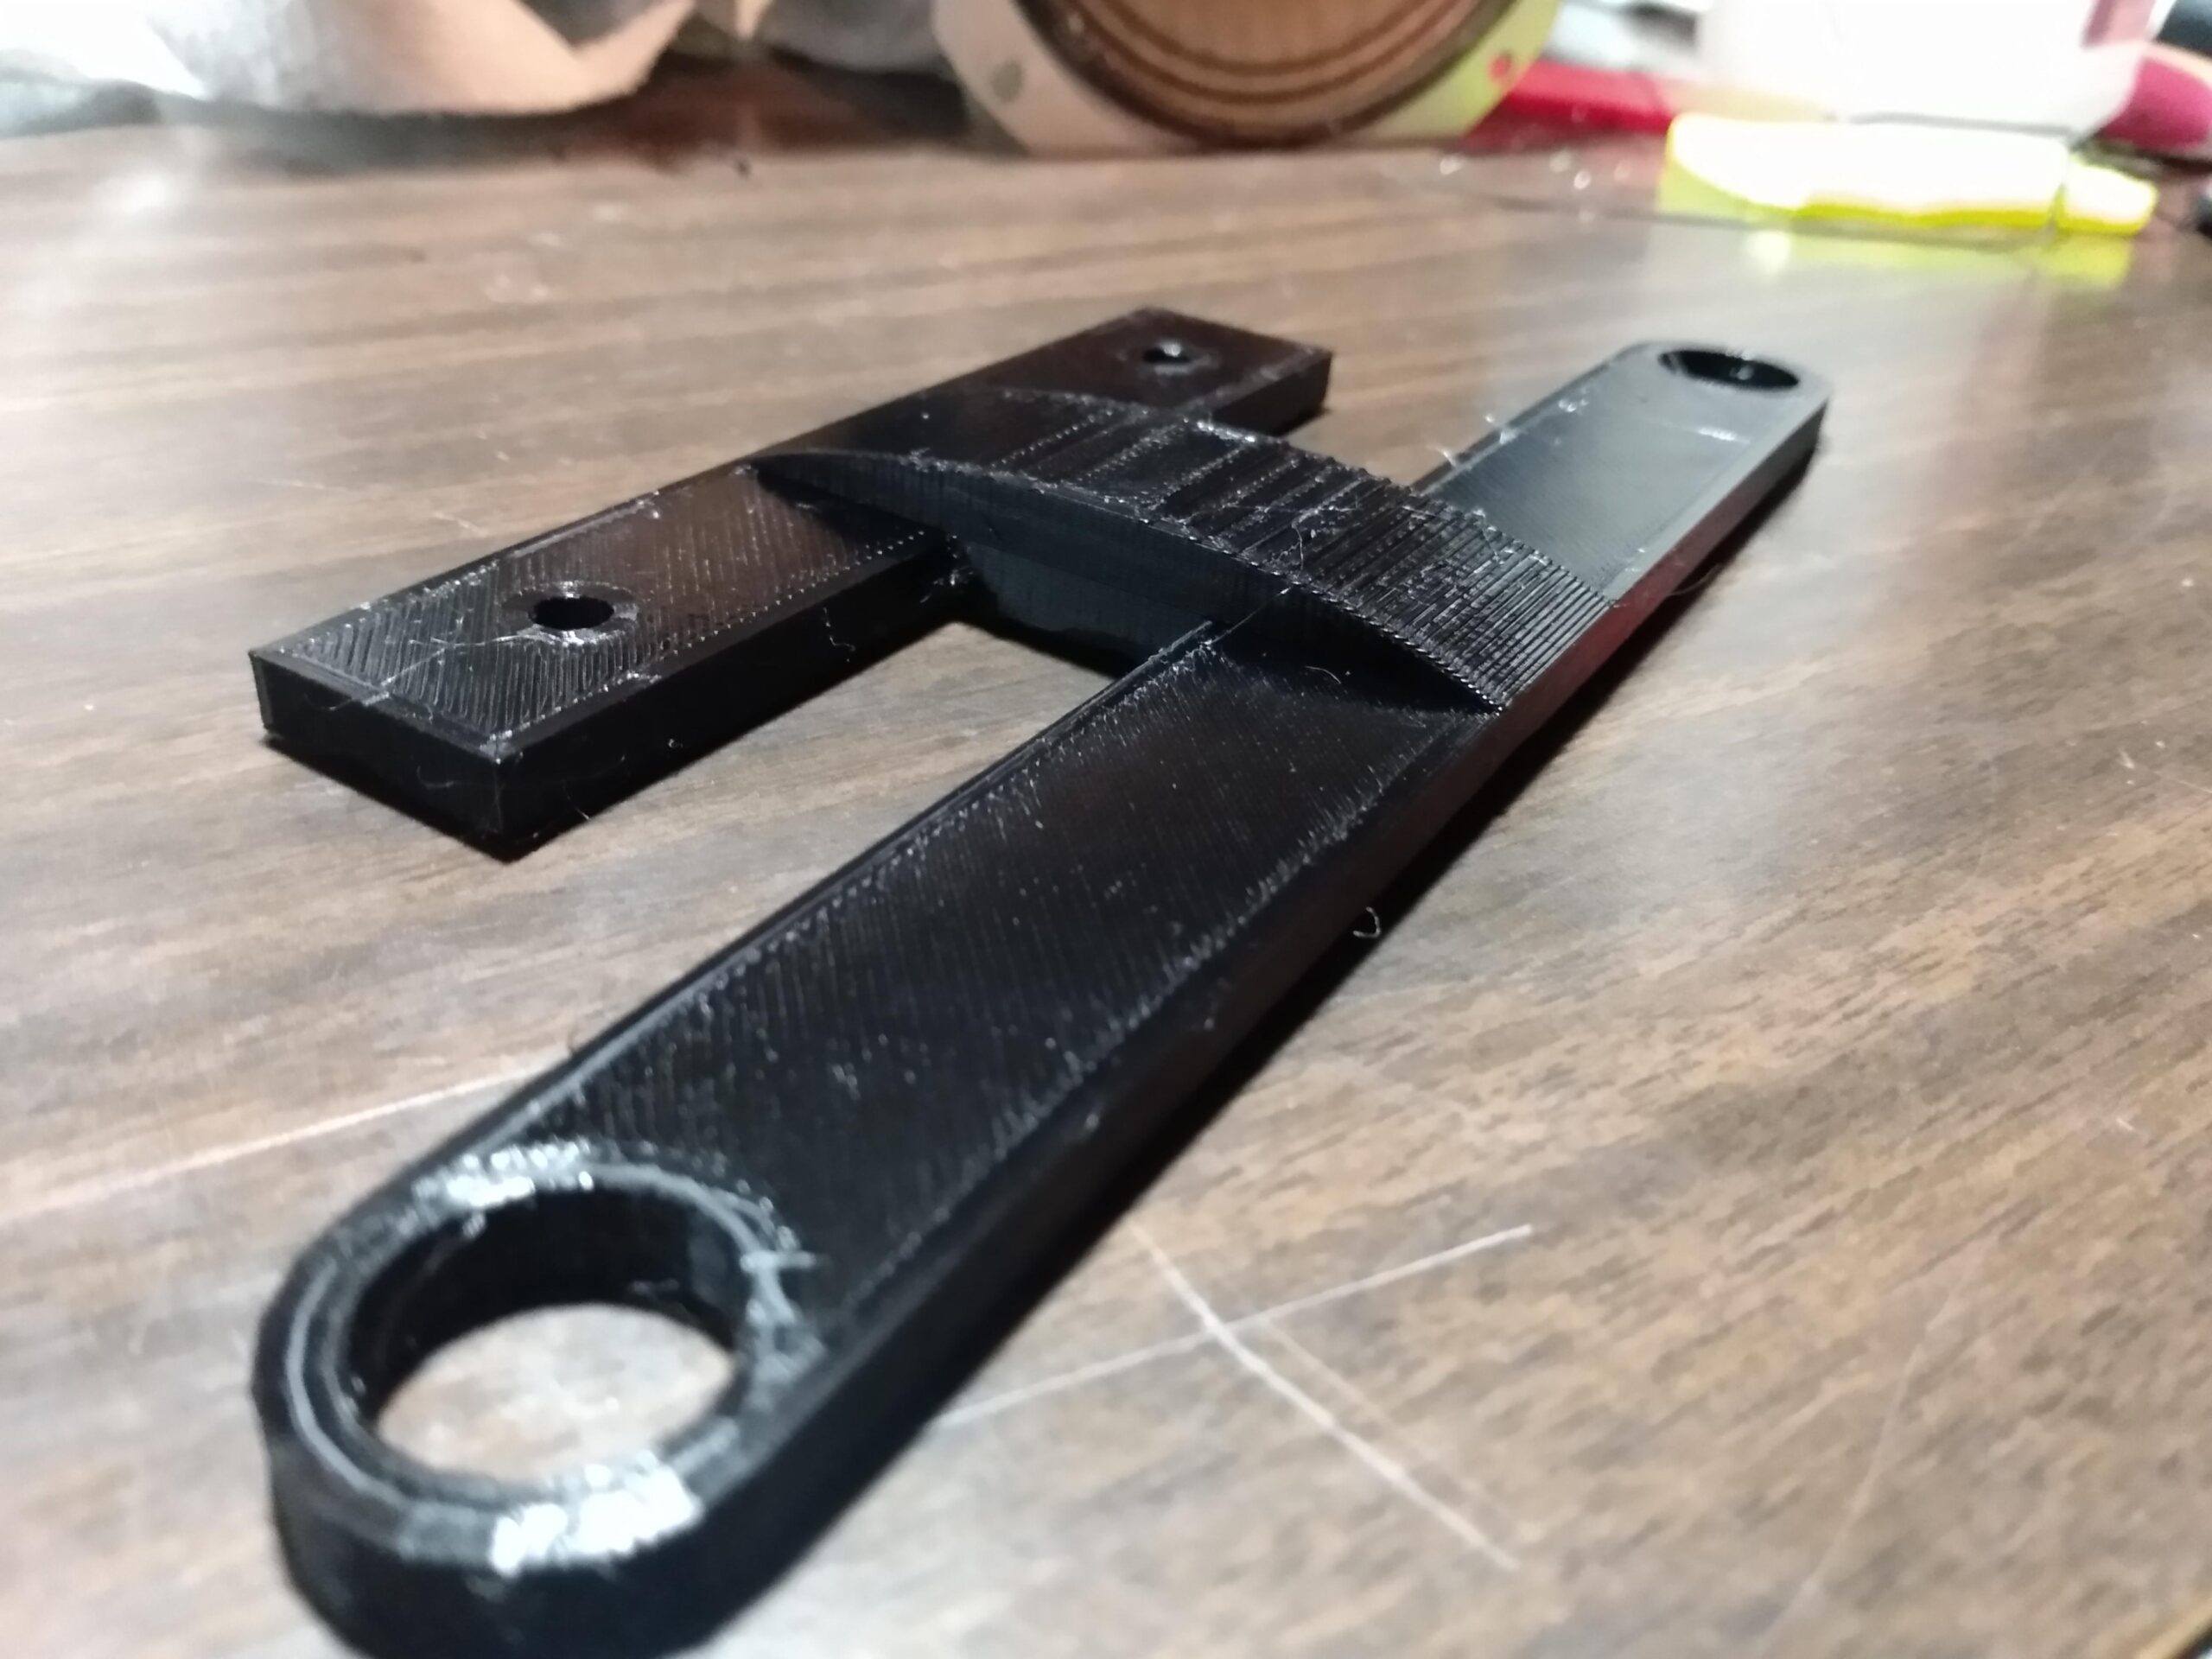
The two headrest posts are 150mm apart on-center, and each one is 13mm thick. The holes in the mounting bracket for the Roadmaster speaker were 69.69mm (nice) apart on-center. I designed a very simple 3mm thick mounting bracket in Tinkercad, which I then printed with black PETG. My very limited experience designing things gave me the wisdom to understand that it wouldn’t be the final version. Which was good, because the first mount broke immediately under the weight of the speaker.
There were other issues with this version of the mount. The posts on the headrest were 13mm thick, but 3D printing and object with a hole 13mm across often means that the hole in the finished print is slightly narrower. This is due to the elephant’s foot effect on the base layer, compression of the extruded filament on subsequent layers, sunspot activity, horizontal vs. vertical polarization, and date of your last Logbook of the World upload. So the holes for the headrest were slightly too small. I increased the size of the headrest holes on the model to 14mm for some additional wiggle room.
I also designed it with the holes slightly too close on the speaker mount side. My measurement of 69.69mm (nice) was correct, but I’m barely able to use Tinkercad so I screwed up the model. I moved the speaker mounting holes apart by about 2mm. In order to strengthen the mount to withstand the weight of the speaker, I increased the mount thickness to 5mm and added an arch to the bottom of the mount to provide strength under compression from speaker weight.
Headrest speaker mount V2 was expected to take about 4.5 hours to print, so I made sure the base layer adhered to the print bed and then found something else to do. When I sobered up, the print was done and it was ready for test fit. The mount printed upside-down, so the reinforcing arch appears on the top in the photo.
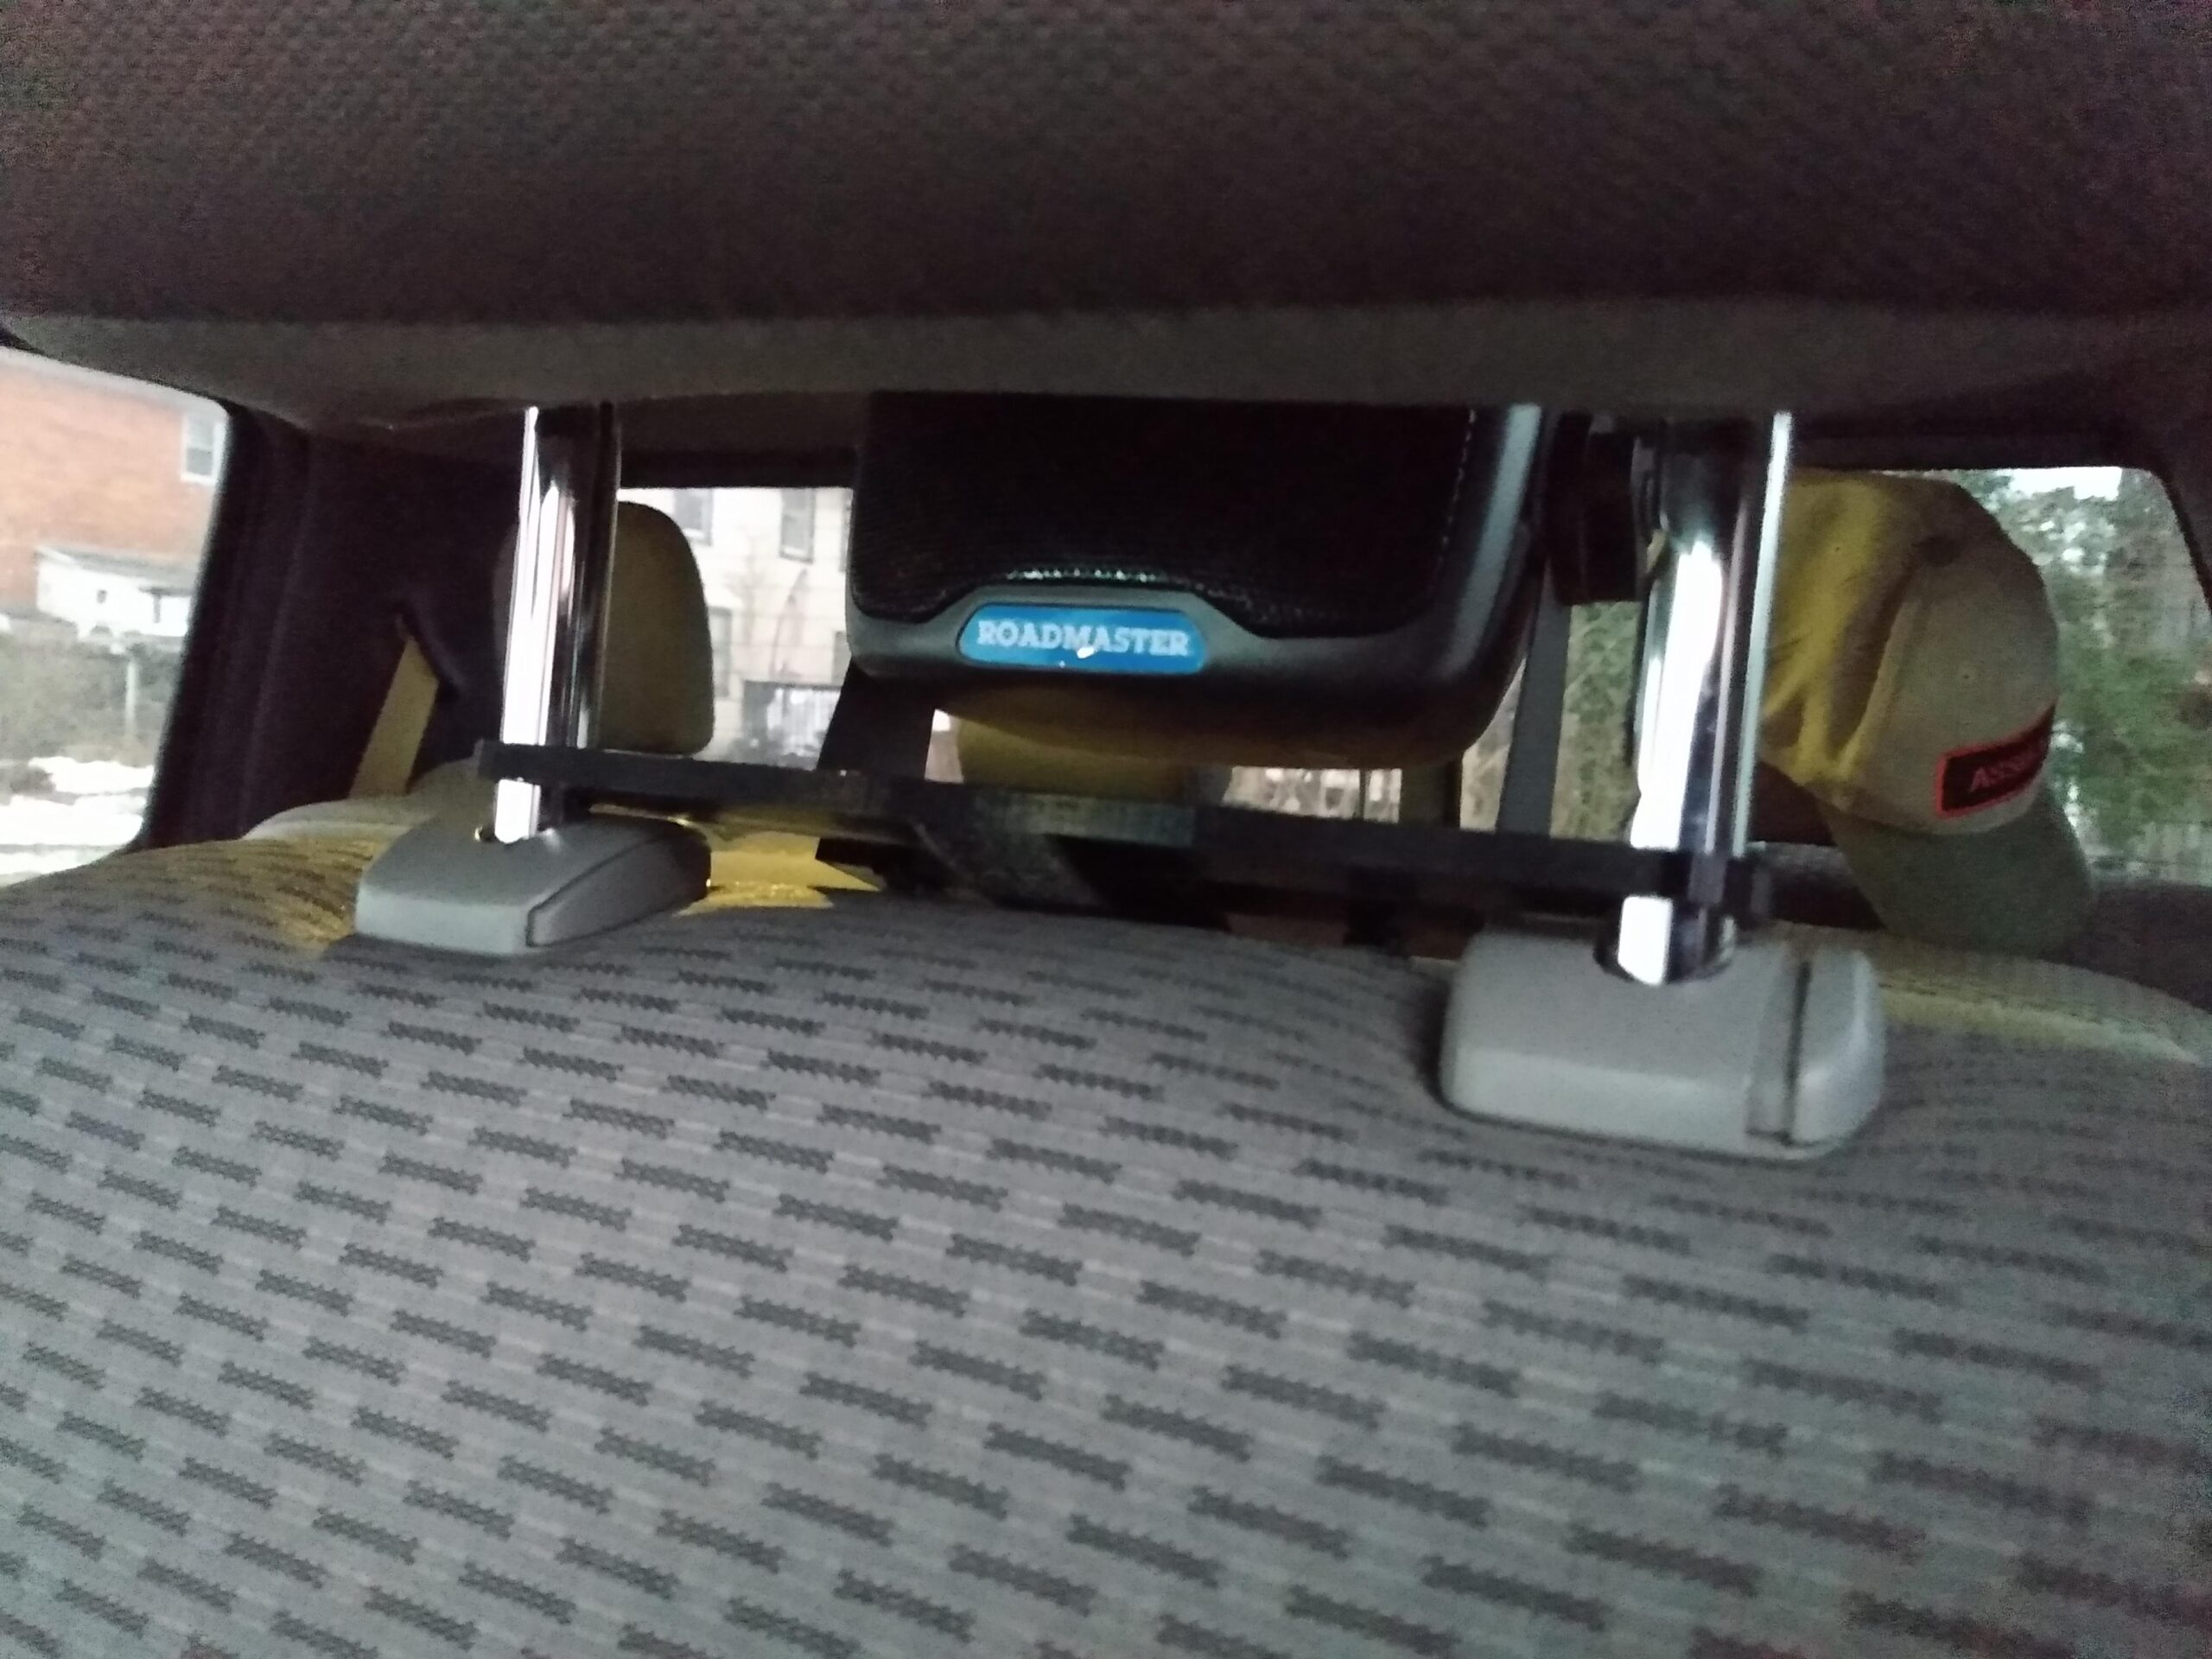
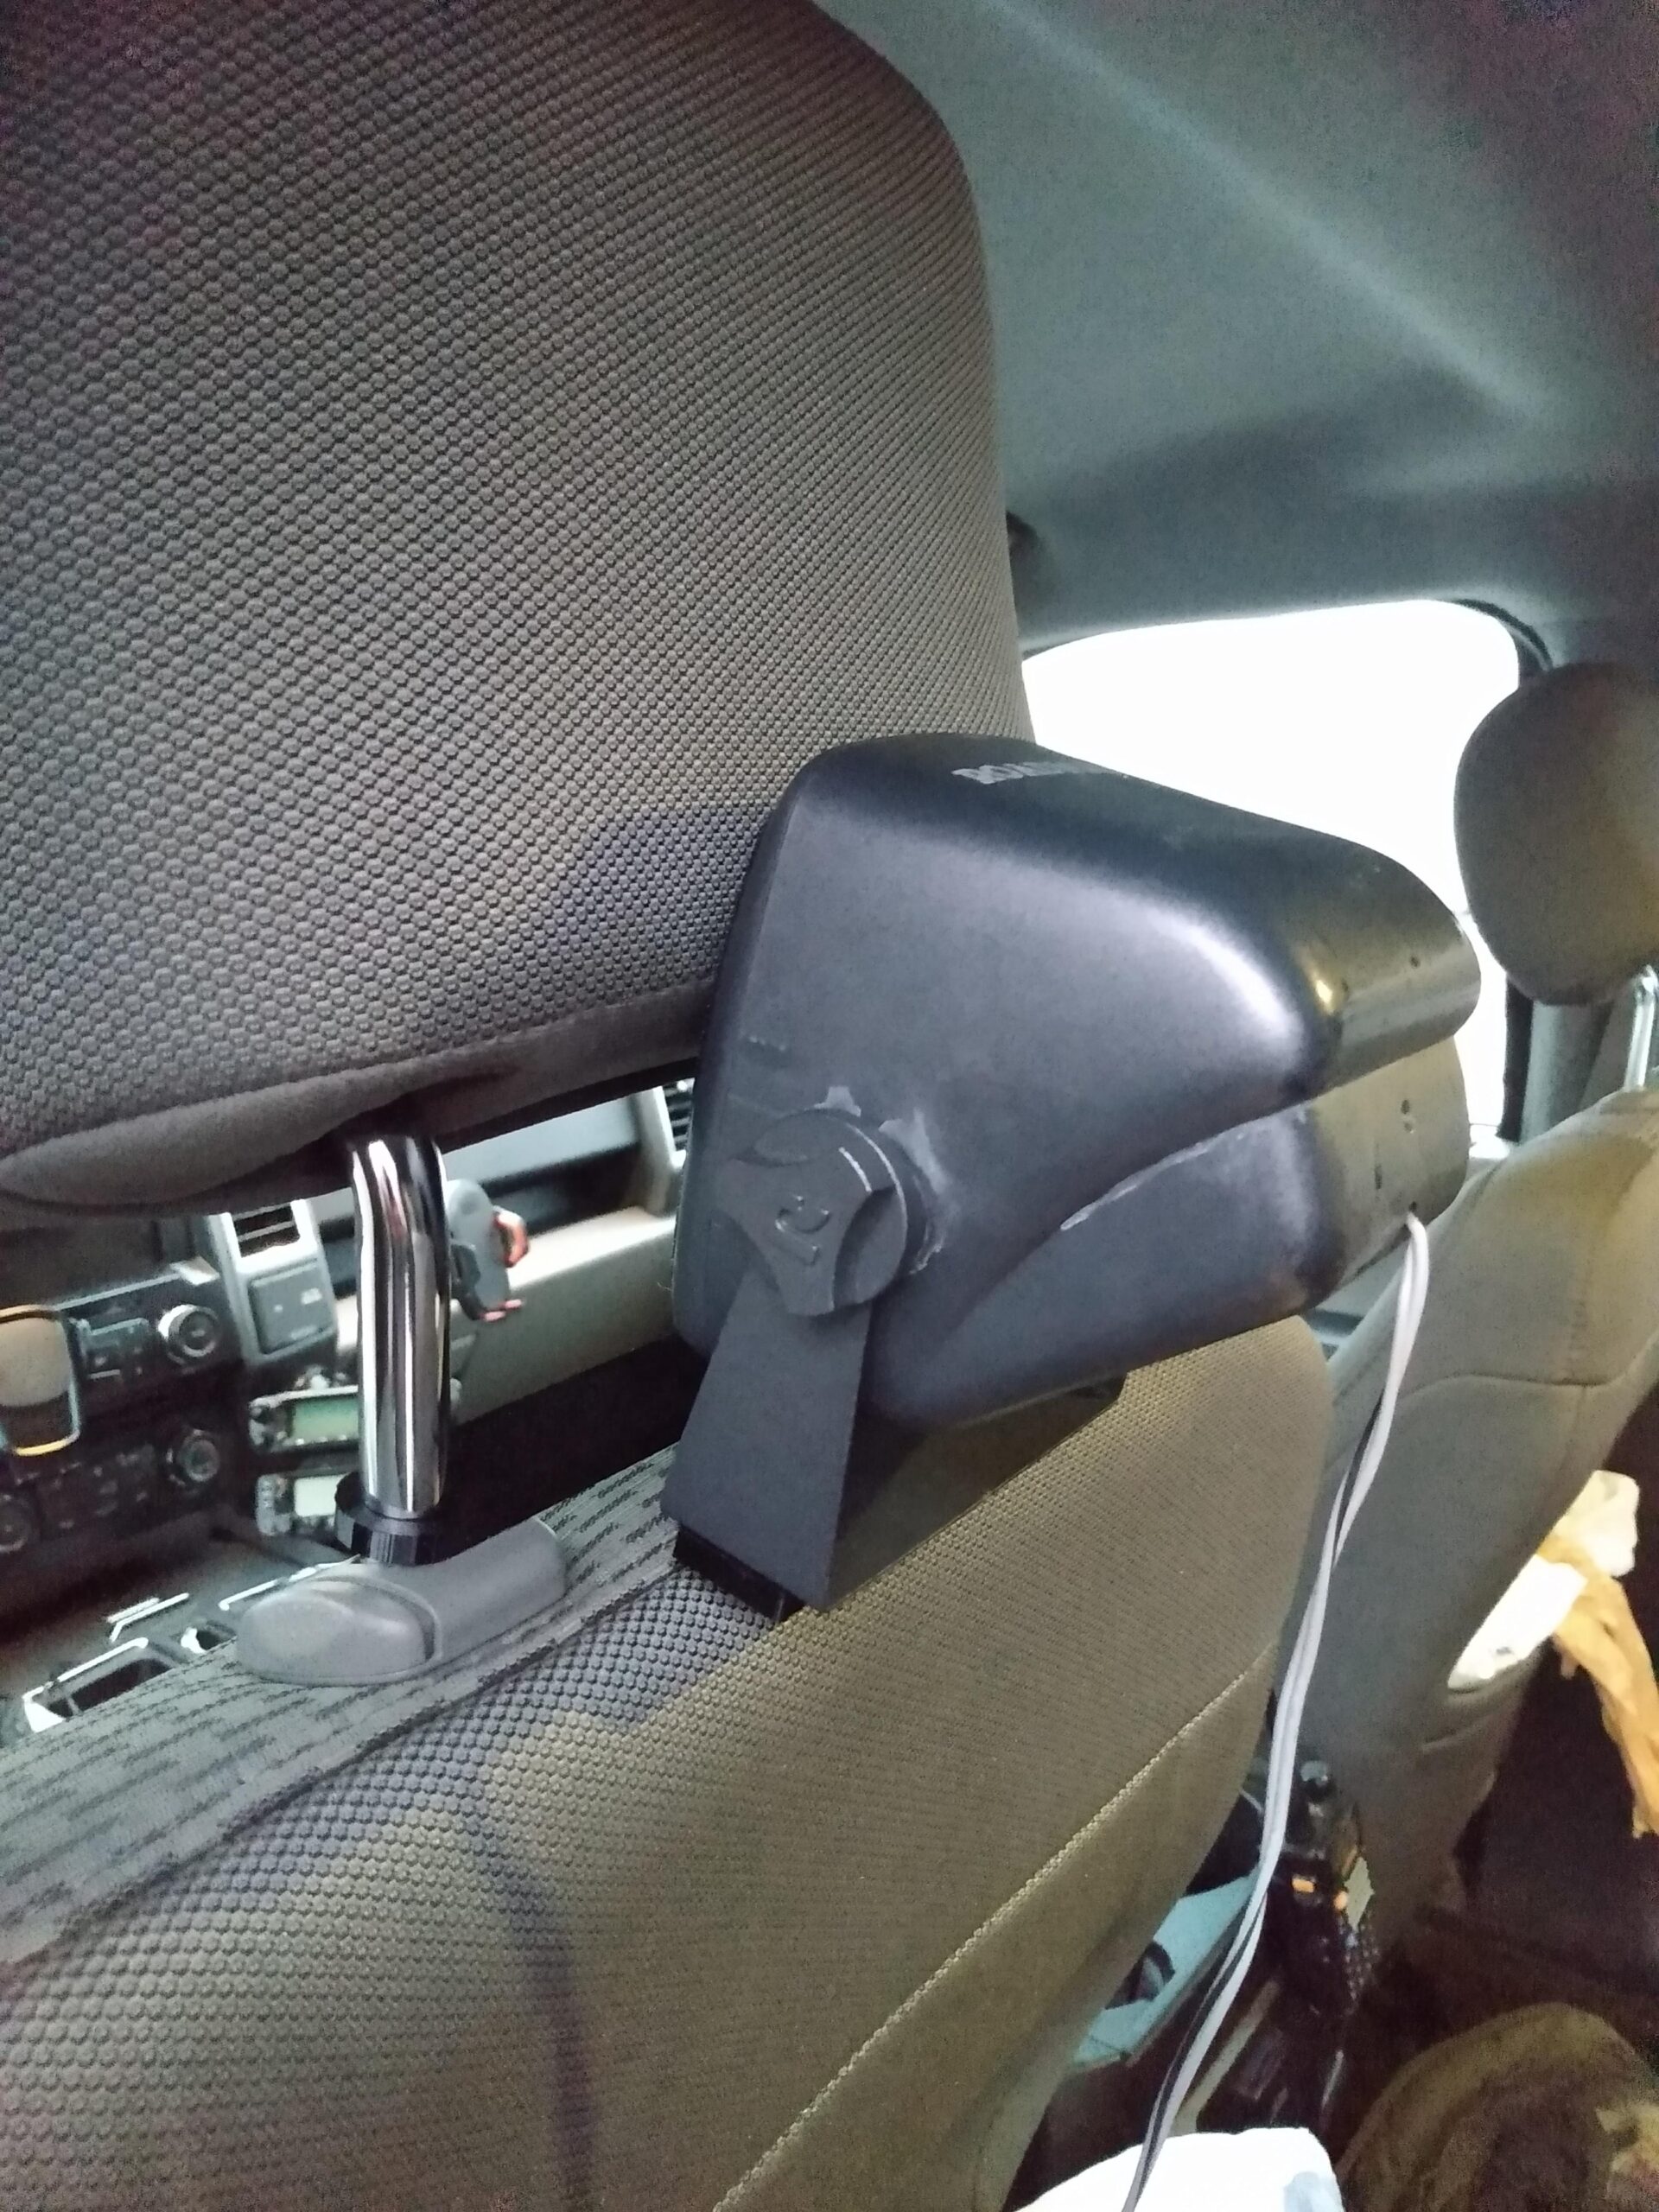
In Mount V2, the headrest post holes were big enough to slide effortlessly onto the posts, and the speaker mounting holes lined up with the holes in the mounting bracket. I used zip ties to mount the speaker to the mount because I’m tired of burning $2 worth of gas to go to the hardware store and buy $0.04 worth of nuts and bolts to mount radio project stuff.
The practical results: The speaker is mounted directly behind my head. I don’t need to crank the volume to hear quiet stations. I don’t need to crank the volume to hear ANY stations. Everything received sounds like it’s coming from inside my head. I can keep the volume low and still hear transmissions clearly, and radio chatter doesn’t irritate my passengers. And with the speaker so close, I get relatively good quality audio that would otherwise be lost amongst the regular cabin noise at highway speed.
STL file of the headrest mount is available upon request.